Deploying a Landing Zone with AWS Control Tower - Part 3
Previously in Part 2 of this Walkthrough, I showed you how to create the organisational structure and enable guardrails within Control Tower.
In this post, I’m going to walkthrough some of the remaining post configuration task including configuring IAM Identity Center and provisioning a new AWS Account through Account Factory.
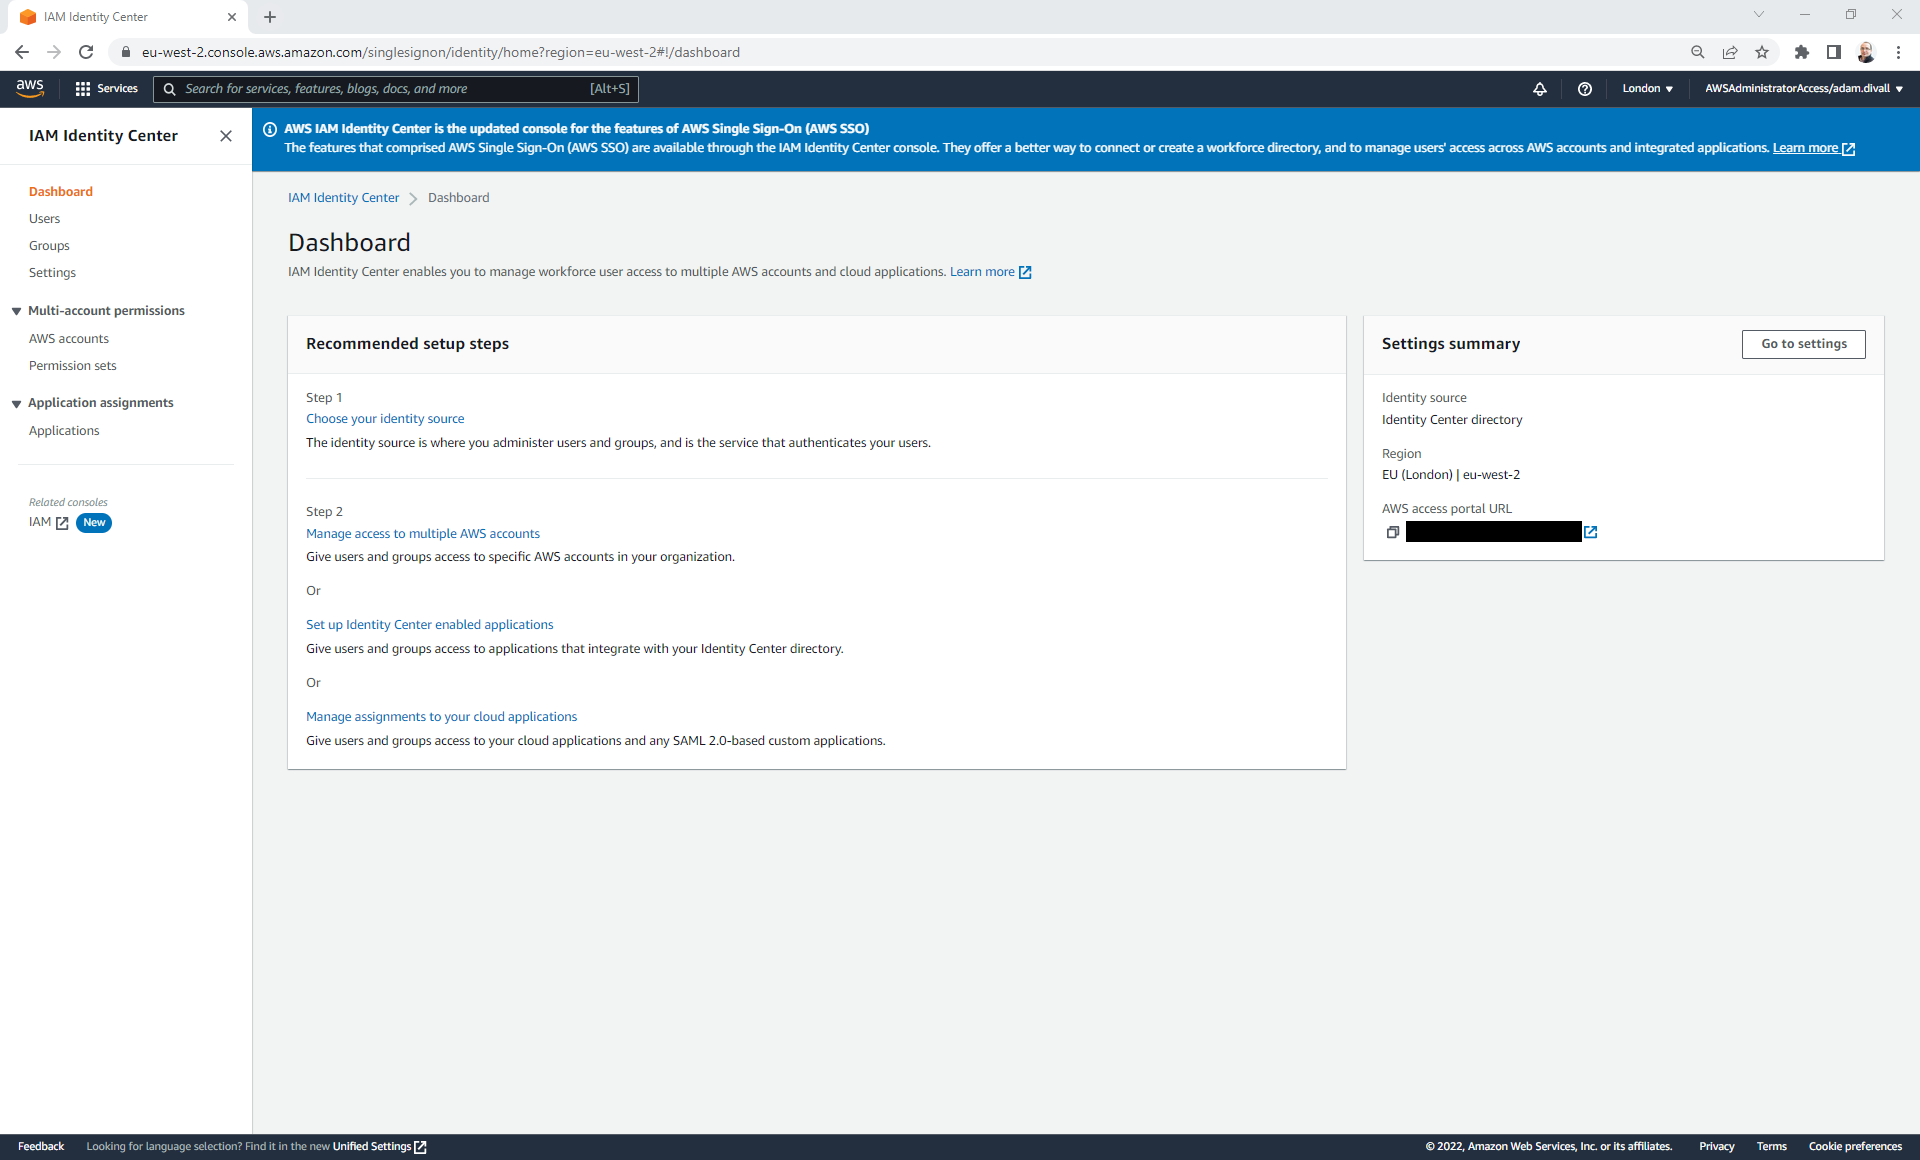
Configuring IAM Identity Center for Single Sign-On
AWS IAM Identity Center (formerly known as AWS SSO) is a service that enables you to have a single point of entry for managing resources within all of your AWS Accounts in an organisation.
As part of the Control Tower deployment this gets enabled using the native Identity Center directory. This allows you to create Users, Groups and Permission Sets that when assigned to an AWS Account would allow you to authenticate and have authorisation to different resources based on the policies defined in the Permission Set. Whilst the Identity Center directory is the default configuration, a post deployment activity is typically to change this to either a 3rd Party Identity Provider such as Azure Active Directory or to perhaps an on-premise Active Directory Domain (AAD).
Since I don’t have access to an Azure Active Directory Domain please refer to the instructions below:
When IAM Identity Center is integrated with a 3rd Party Solution such as AAD, you add your AAD Groups to the Azure Enterprise Application. As part of the System for Cross-domain Identity Provisioning (SCIM), Groups and the Users that are member of those Groups will be replicated and created within IAM Identity Center. This provides the User the ability to then login through the AWS access portal URL to authenticate using there standard login details that they’ll use for other business workloads such as E-Mail etc.
Since all the identity management is now connected to the corporate AAD, things such as password policies are handled by AAD. However, Multi Factor Authentication (MFA) could be handled either by AAD or alternatively you may decide to handle that within IAM Identity Center.
Enabling MFA in IAM Identity Center
- Login to the AWS Management Console and Navigate to IAM Identity Center.
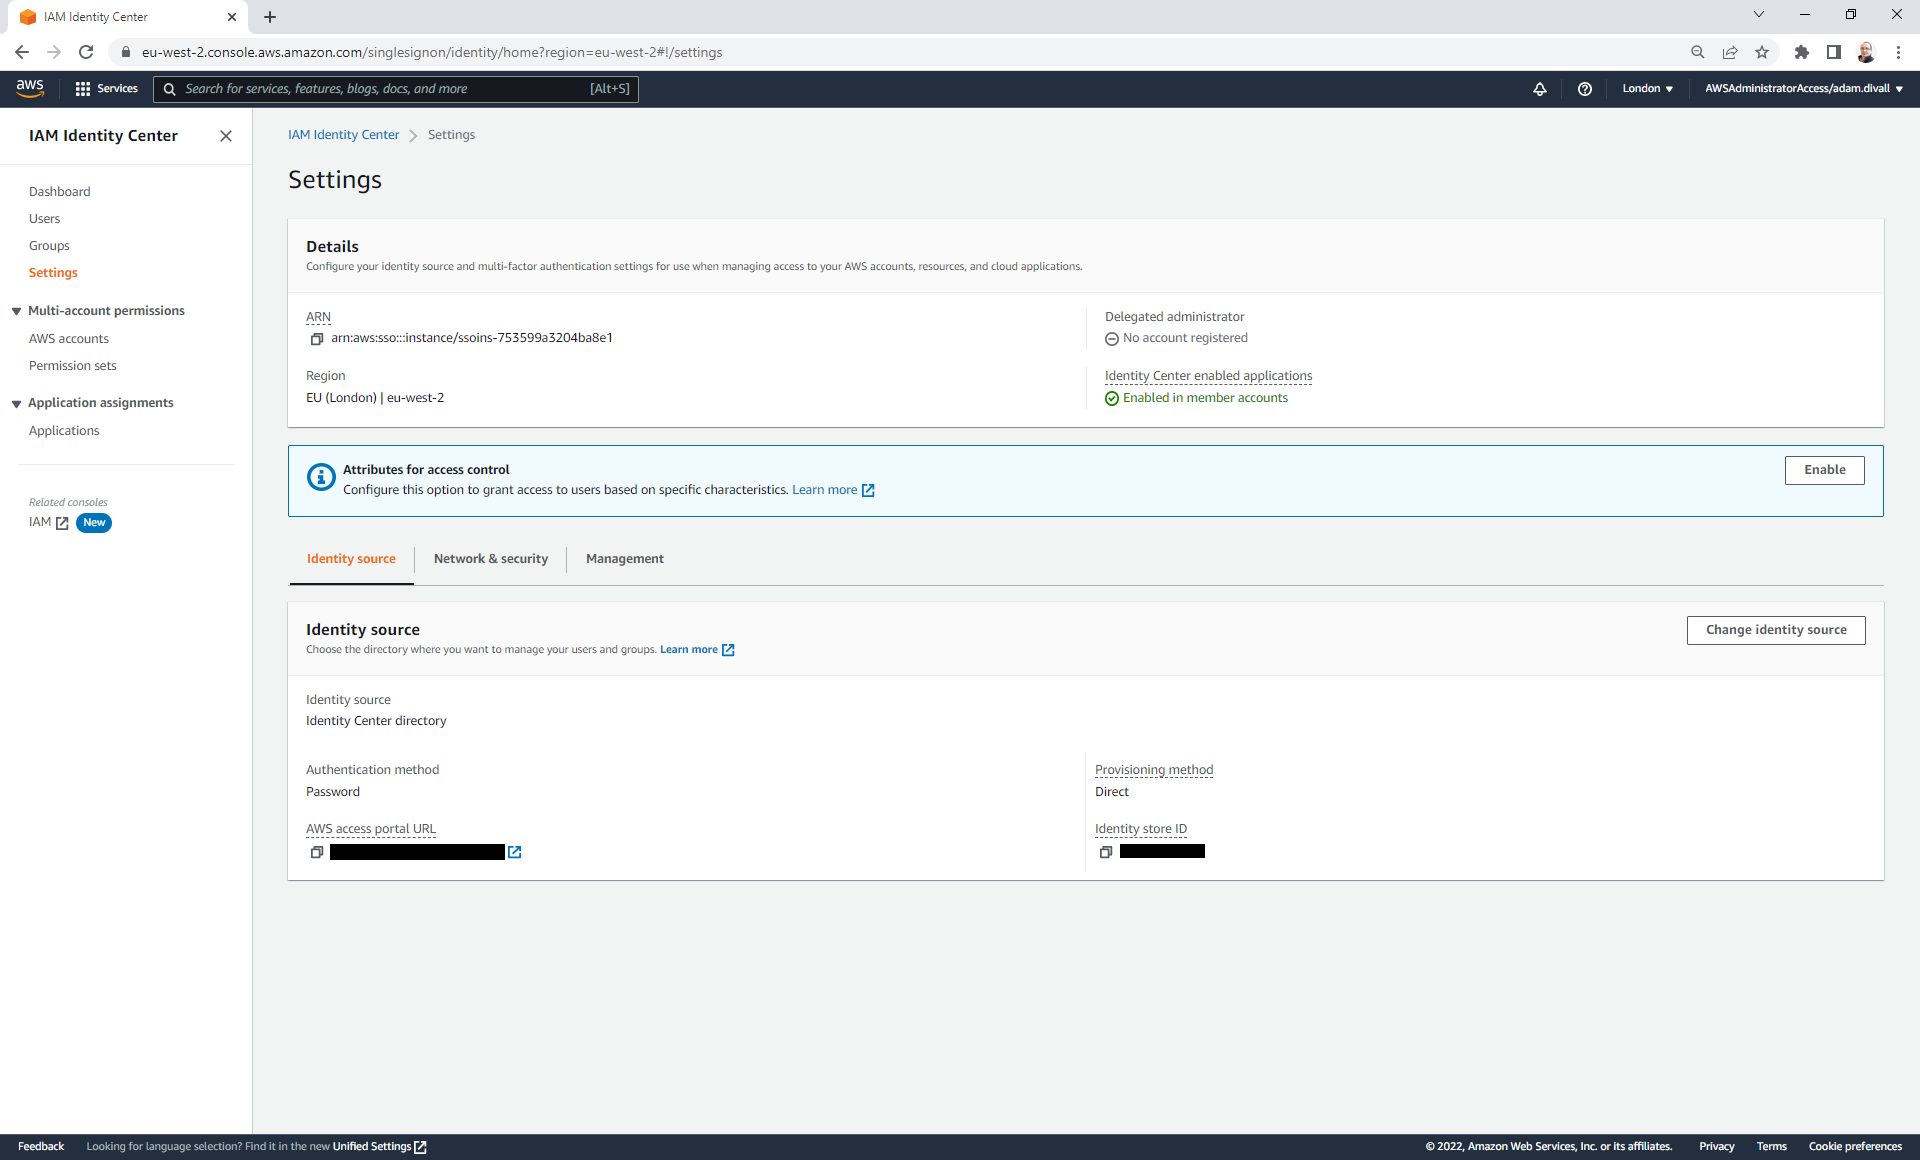
- Click Settings.
- Click the Network & security tab.
- Click Configure under Multi-factor authentication section.
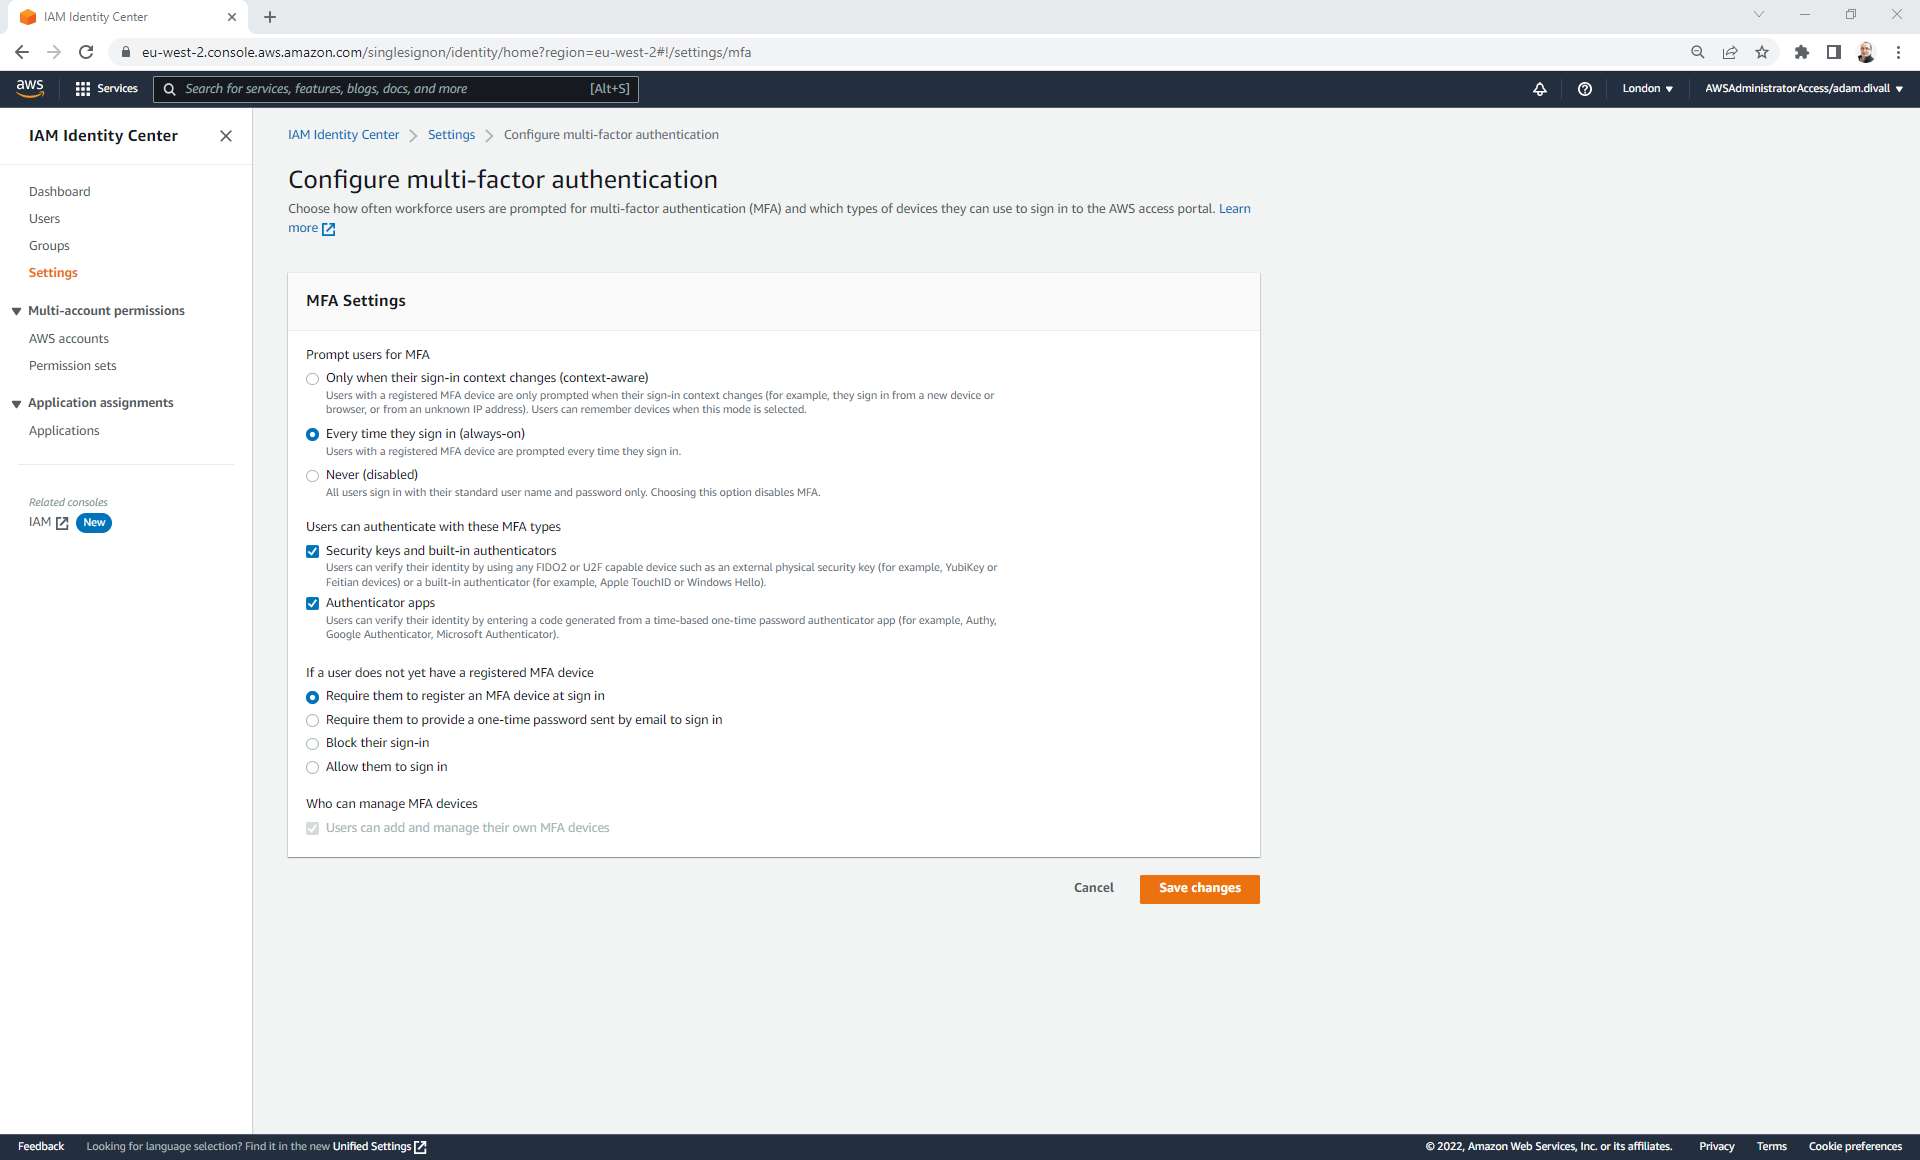
- Select Every time they sign in (always-on) under the “Prompt users for MFA” section.
- Select Security keys and built-in authenticators and Authenticator apps under the “Users can authenticate with these MFA types” section.
- Select Require them to register an MFA device at sign in under the “If a user does not yet have a registered MFA device” section.
- Click Save changes.
Creating a Permission Set
As a best practice, permissions should follow the principle of least privilege access. An enabler of this is through the use of Permission Sets with IAM Identity Center. There are several default Permission Sets created by Control Tower although these don’t always meet all requirements.
Behind the scenes one you’ve created a Permission Set and you’ve assigned it to the AWS Account(s) that you want that applied to and the Groups you want to associate, an IAM Role is created hwhich has a Trust policy configured to only allow the role to be assumed using SAML and it must have come via the IAM Identity Provider within that Account which was also created by IAM Identity Center.
- Login to the AWS Management Console and Navigate to IAM Identity Center.
- Click Permission sets.
- Click Create permission set.
- Select Custom permission set and then Click Next.
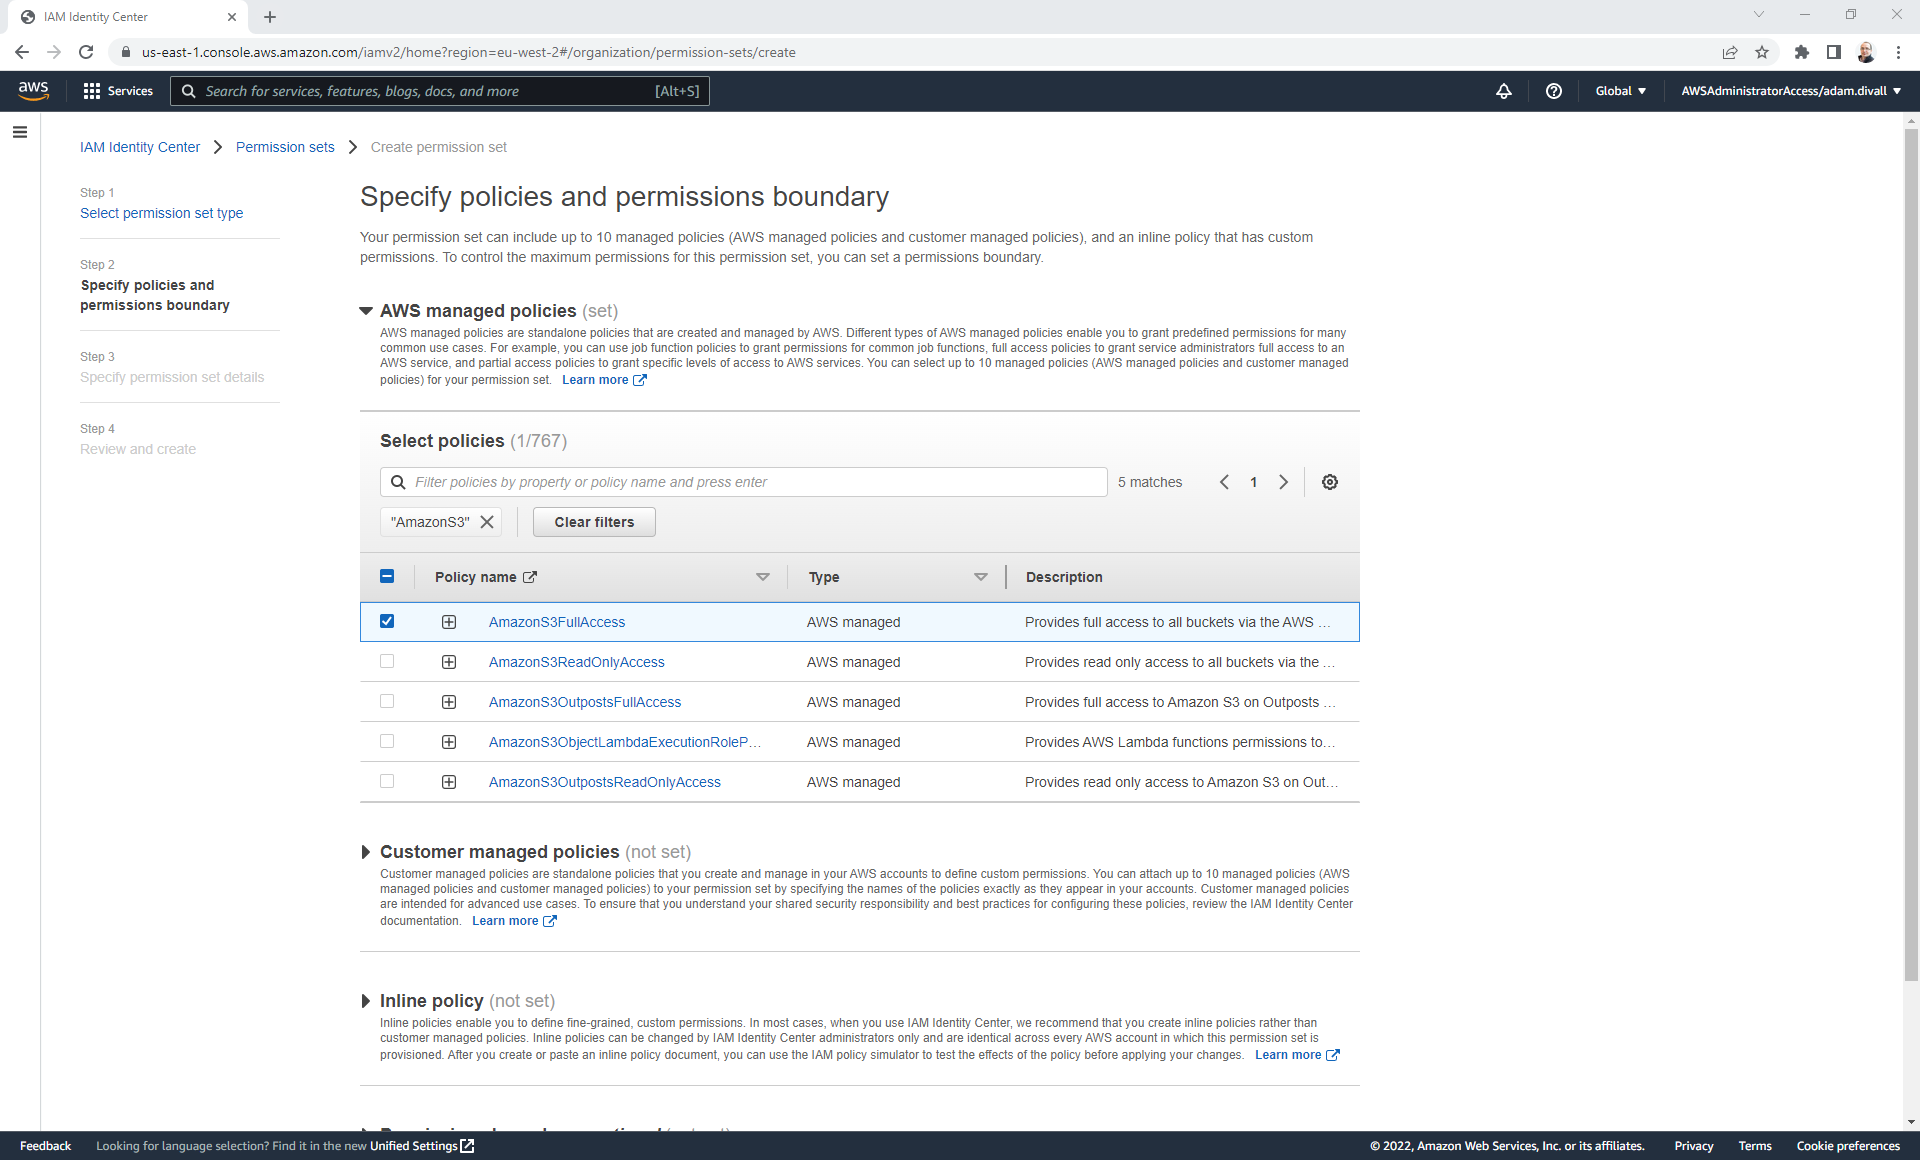
Depending on what you’re trying to achieve from a permissions allocation perspective, you might attach different types of policies or a combination of them all. This could include AWS Managed Policies, Customer Managed Policies, Inline Policies and or Permissions Boundaries. In this example, I’m going to show it just using an AWS Managed Policy as I only want to give S3 Full Access to people via SSO.
- Expand AWS Managed Policies.
- Filter by AmazonS3, Select AmazonS3FullAccess and then Click Next.
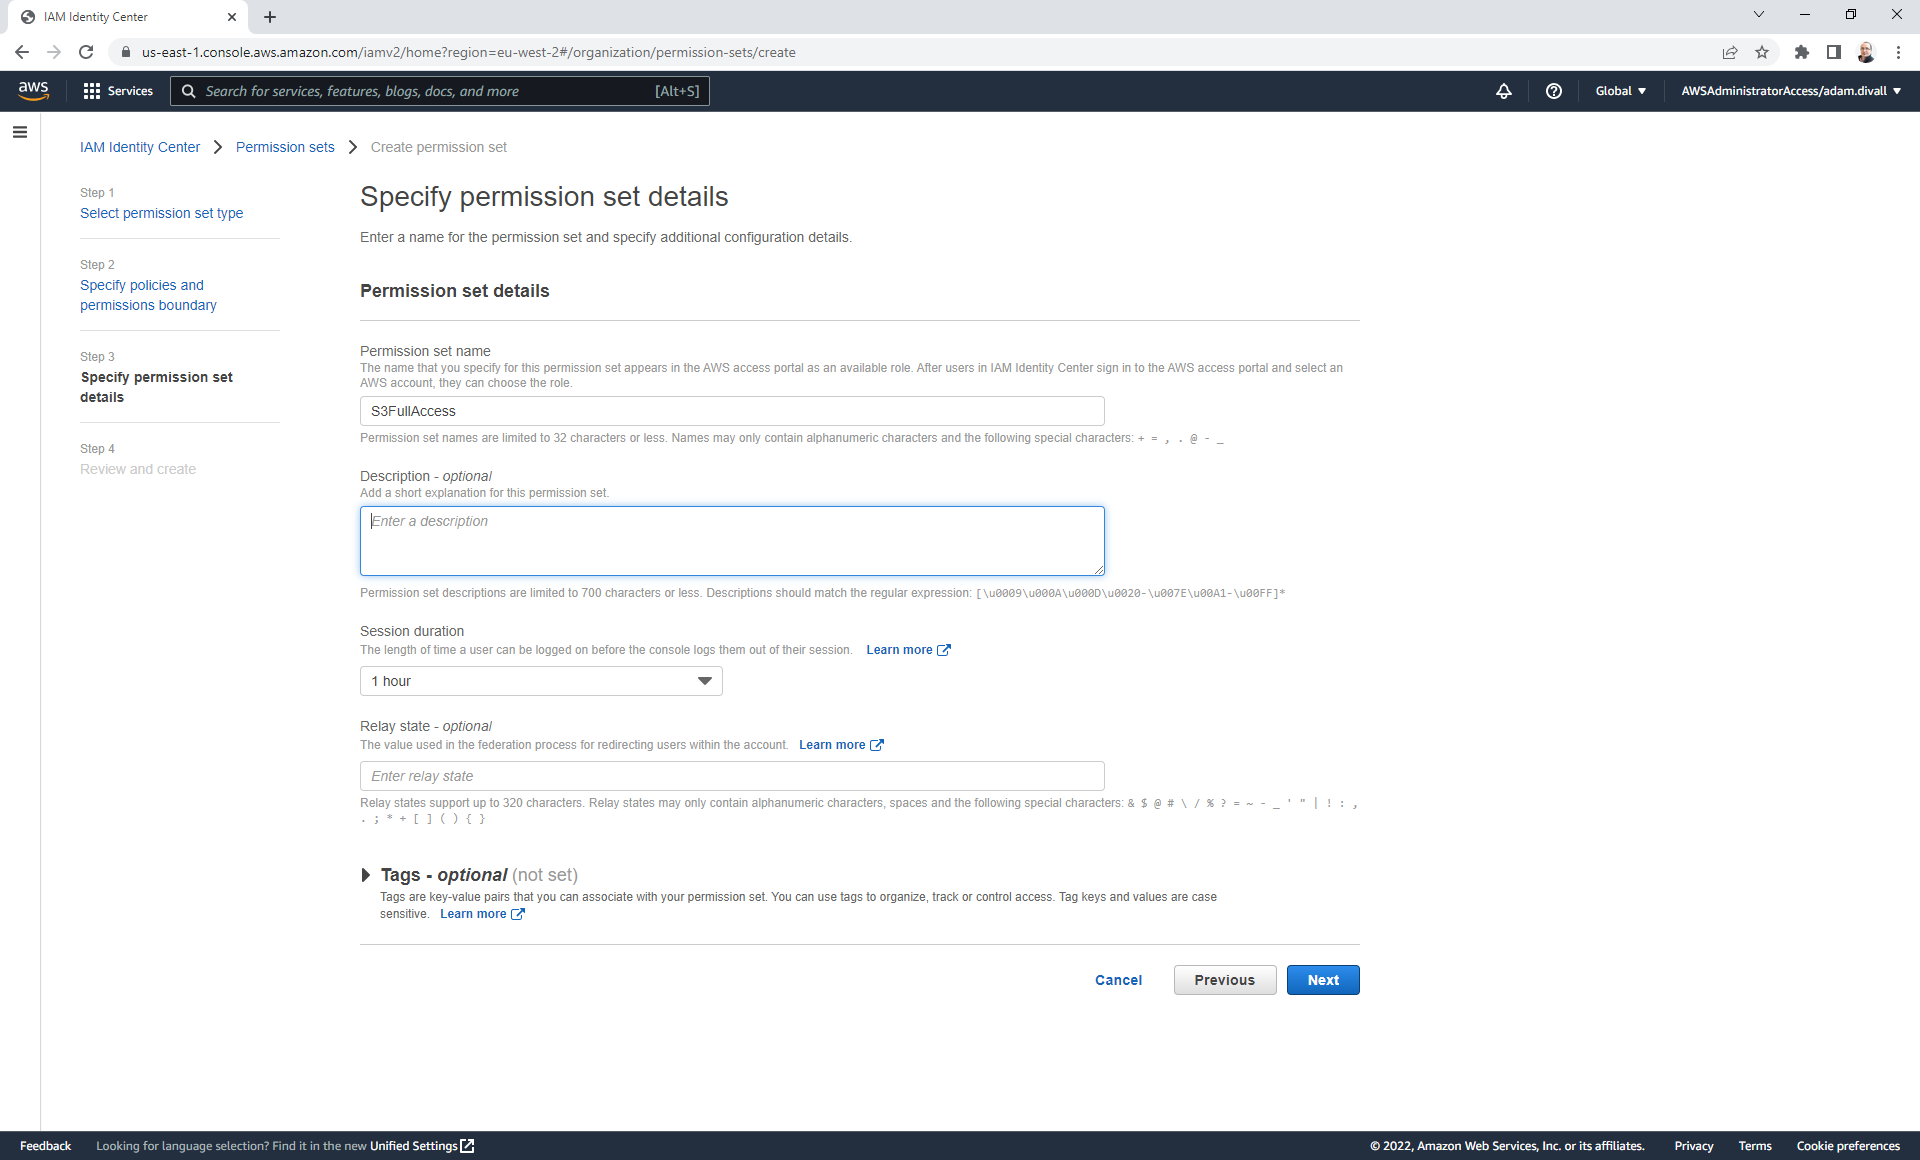
- Give the Permission Set a name and then Click Next.
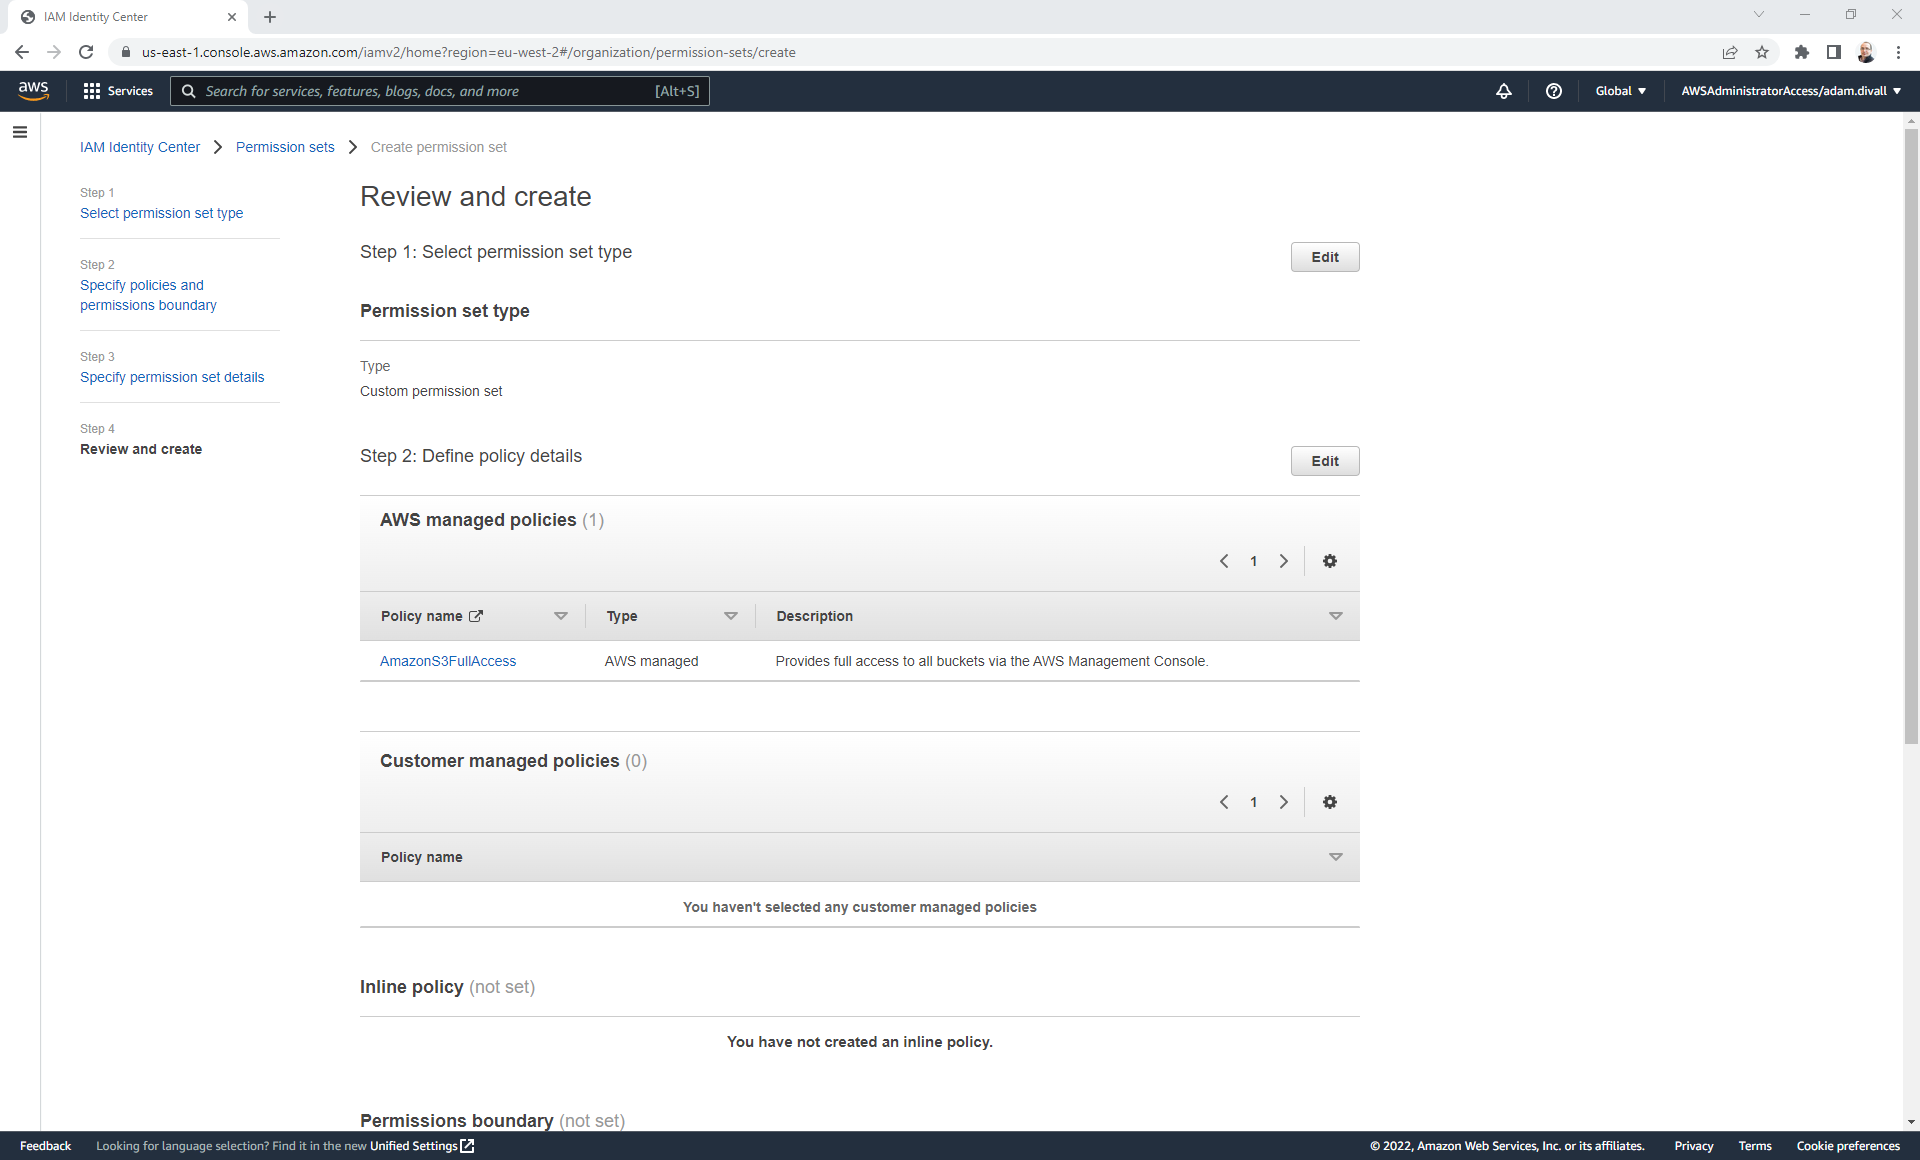
- On the Review and create page, Click Create.
Assigning a Permission Set to a Group
- Login to the AWS Management Console and Navigate to IAM Identity Center.
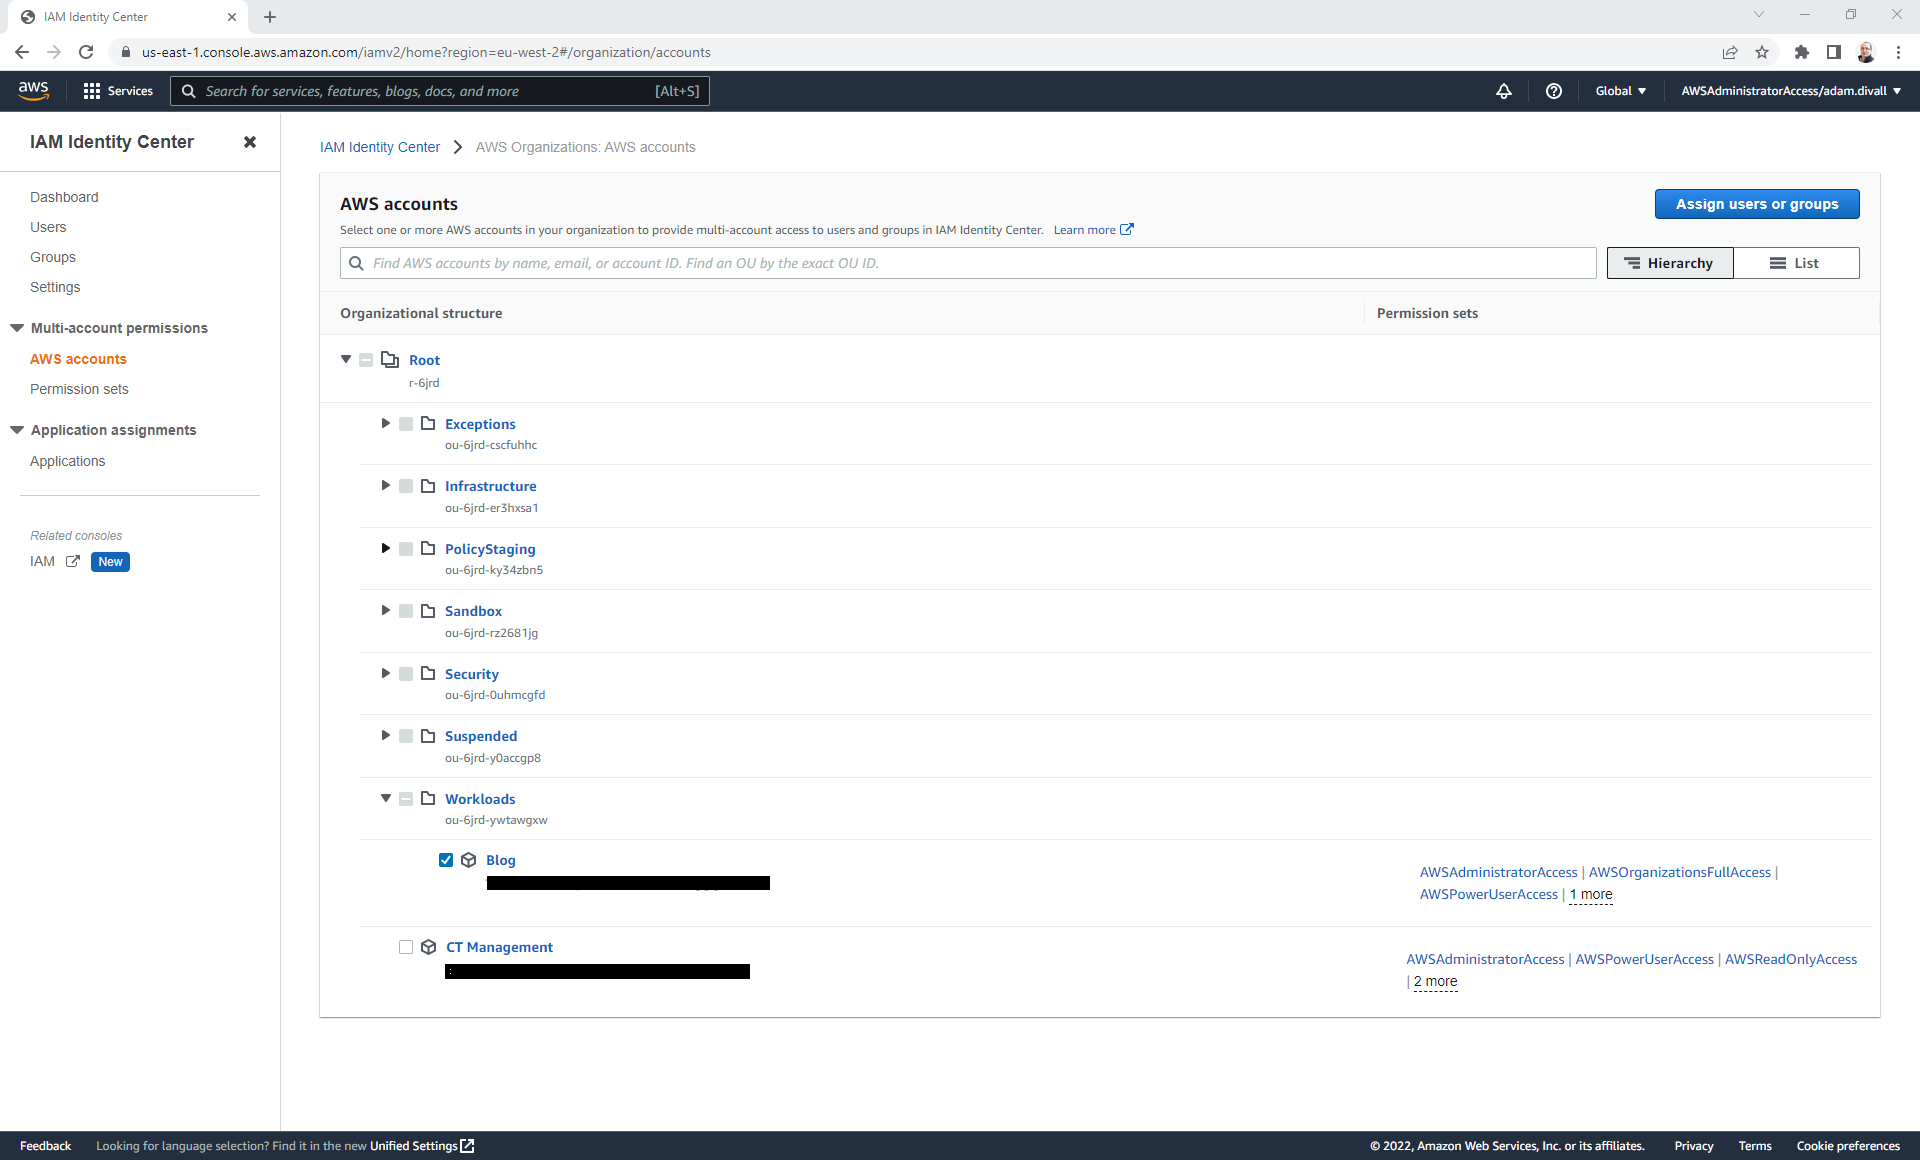
- Click AWS Accounts.
- Select the AWS Account that you wish to allow Groups access to and Click Assign users or groups.
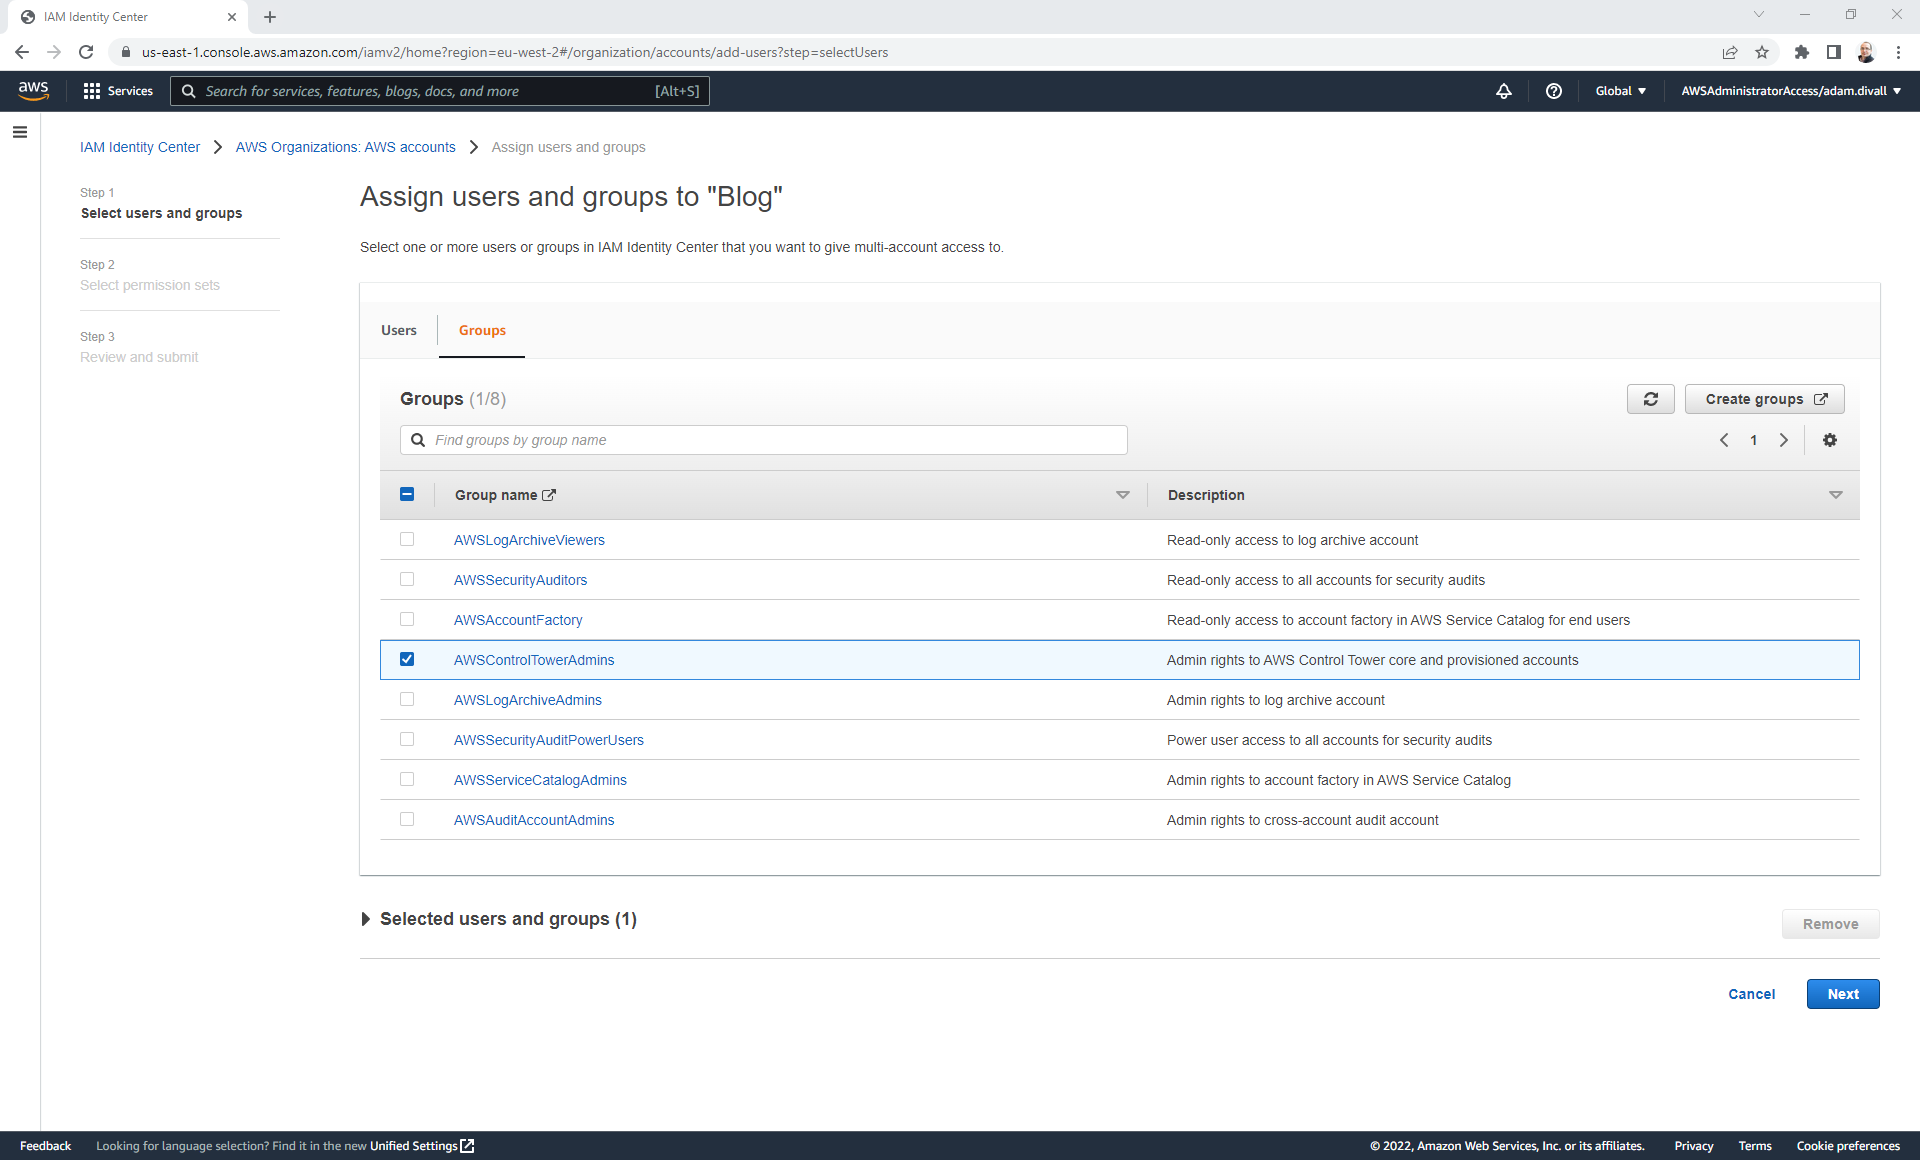
- Click the Groups tab.
- Select the Group(s) that you wish to assign the Permission Set too and Click Next.
- Select the Permission Sets that you wish to assign and Click Next.
- Click Submit.
The next time the user authenticates through Single Sign-On they’ll be able to leverage the new permissions as they’ll see another role available to them.
Working with the Account Factory
One of the capabilities that Control Tower provides is the Account Factory. Account Factory is used for provisioning new AWS Accounts that will in turn be governed via Control Tower and will be configured with all the baselines that Control Tower will provide such as CloudTrail, Config, CloudWatch as well as guardrails.
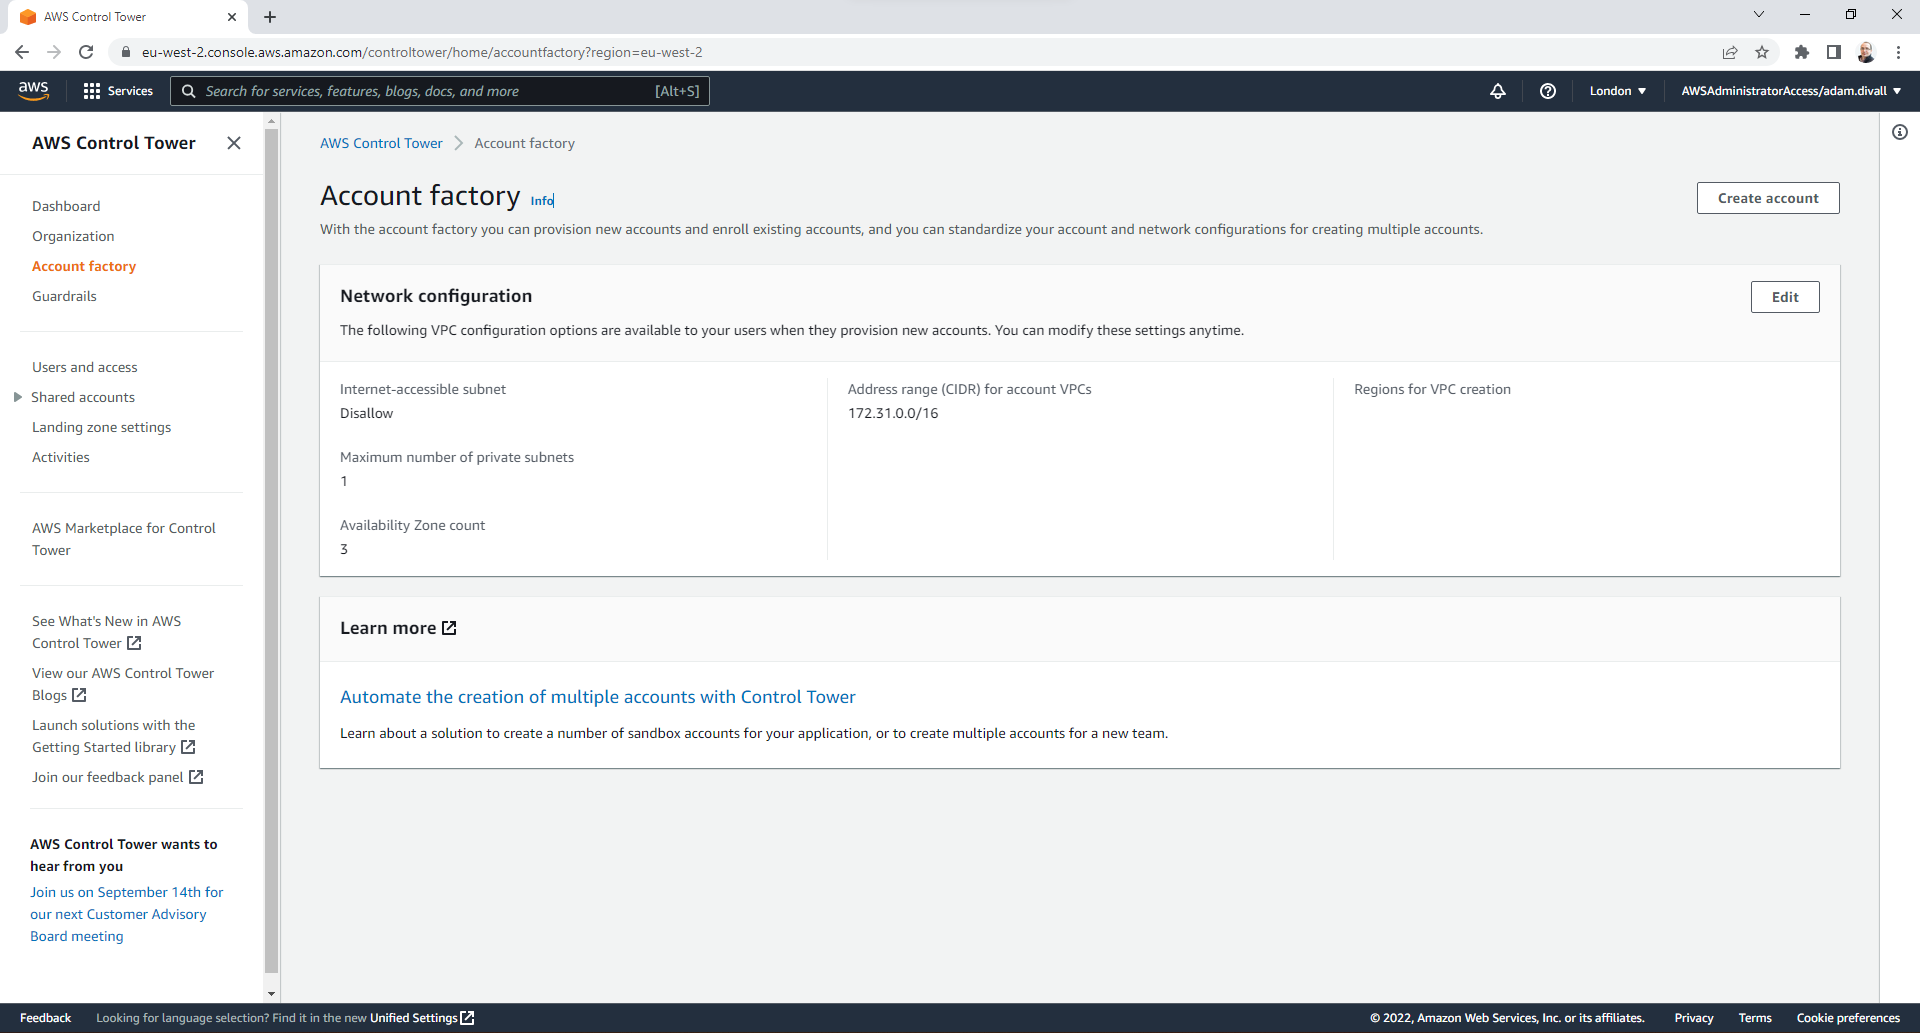
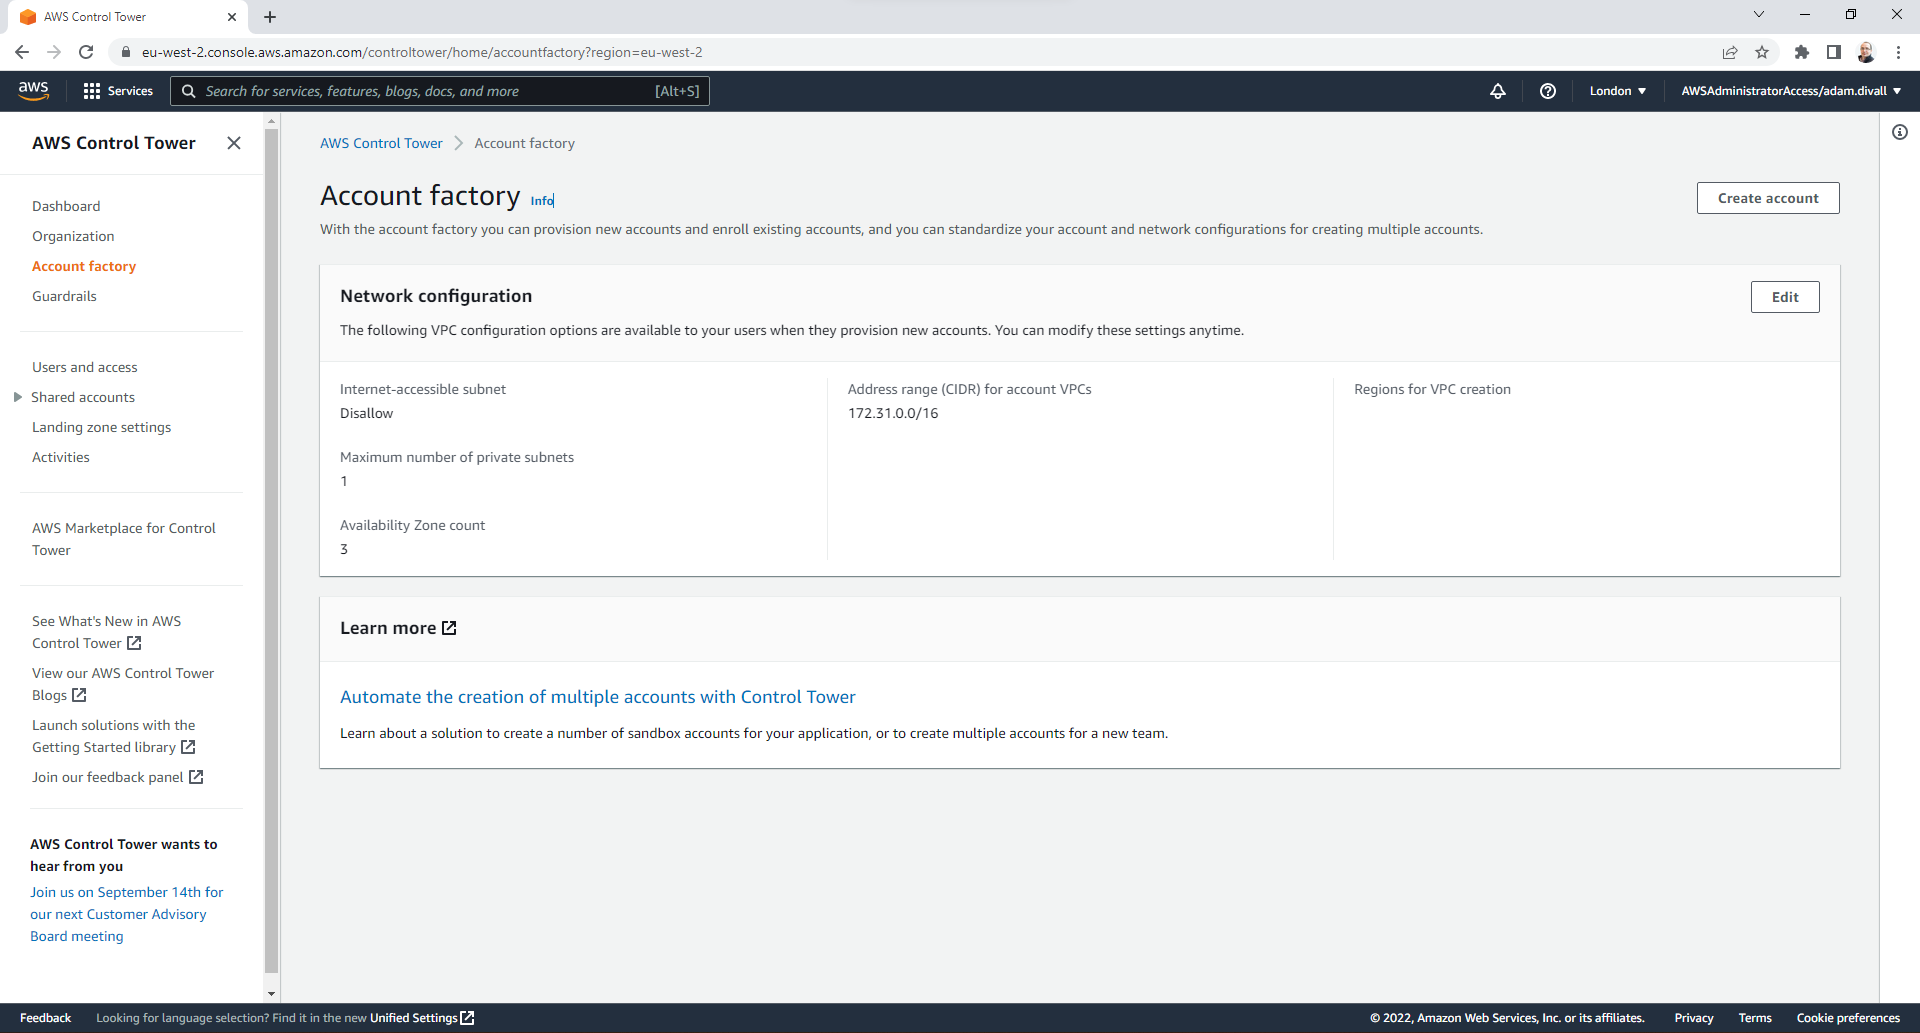
The Account Factory provides the ability to create a VPC as part of the Account provisioning. A key challenge of this functionality is that the Network configuration is controlled within the Control Tower Console. This configuration allows you to have the choose whether you have Public Subnets and/or Private Subnets and up to a maximum of 2 Private Subnets per Availability Zone and deployed based on a Well-Architected design. One of the configuration choices is the CIDR range that you select for the entire VPC, but you have no option as to how this is then utilised for the Subnets - it’s simply split evenly across them all. Another is the region(s) that this same VPC configuration is implemented in which is determined by the regions that are governed by Control Tower. In situations where you have multiple regions that require VPC’s and the Account is provisioned via the Account Factory, this goes against best practices since you end up with overlapping CIDR ranges which would cause network routing issues should these VPC’s need to communicate with each other.
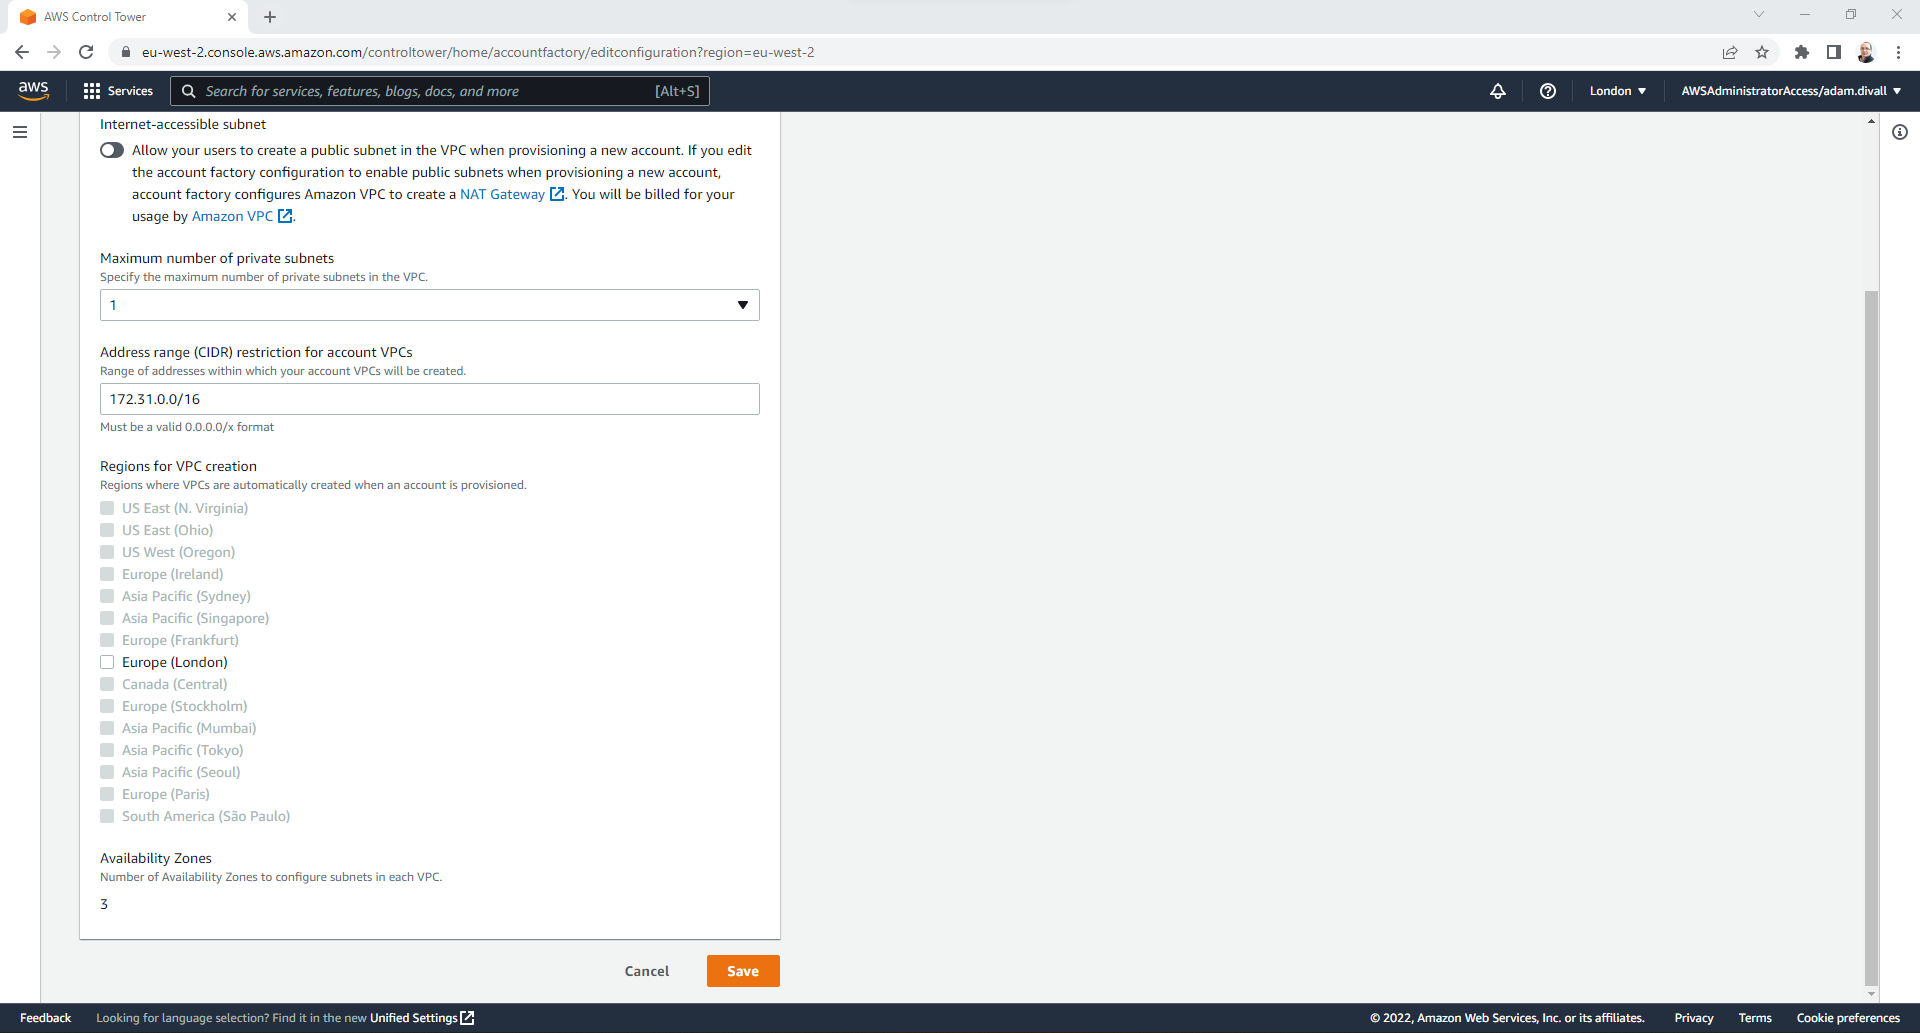
Therefore I would recommend disabling this functionality in the Account Factory, by unchecking any regions in the Account Factory Network Configuration. This can be done by:
- Login to the AWS Management Console and Navigate to Control Tower.
- Click Account factory.
- Click Edit.
- Unchek all Regions to disable the VPC provisioning element of the Account Factory and then Click Save.
Creating a New AWS Account
- Login to the AWS Management Console and Navigate to Control Tower.
- Click Account factory.
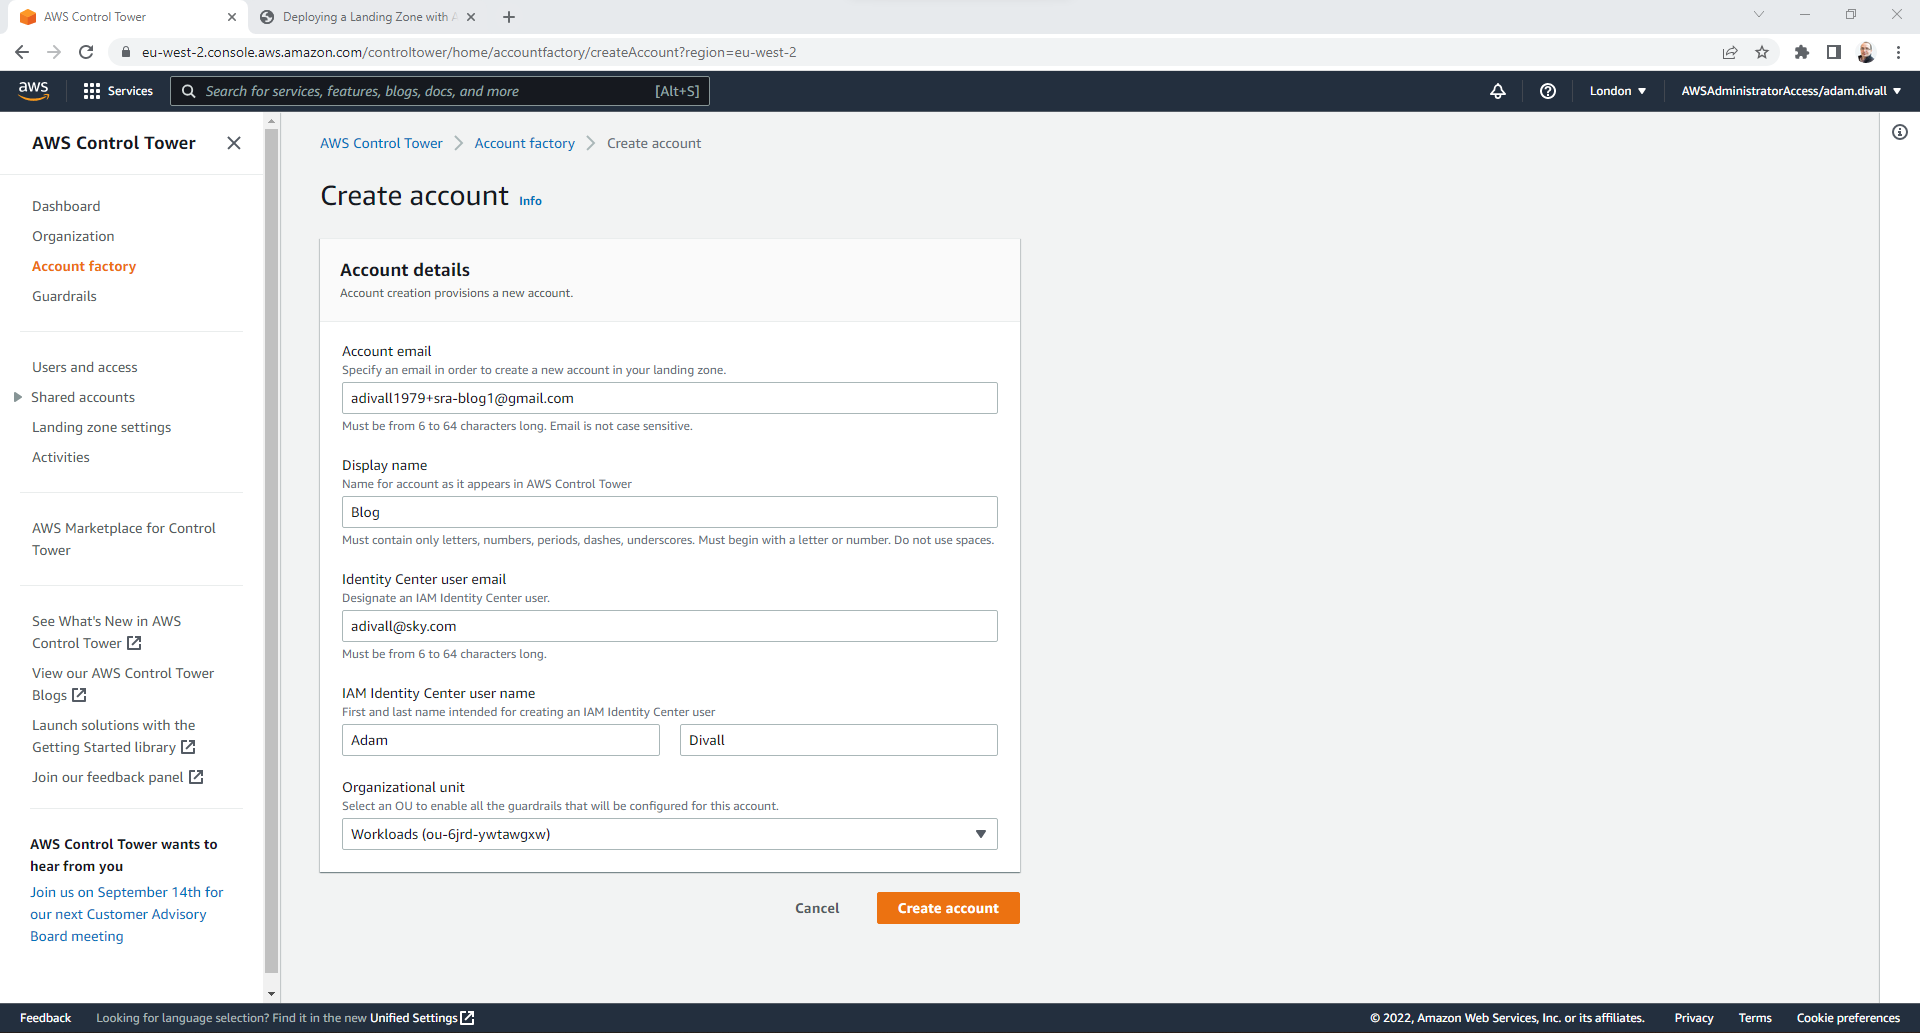
- Click Create account.
- Under the Account email section, enter the E-Mail address that you want to associated with the root user of the new AWS Account.
- Under the Display name section, enter the Name that you want to assign to the new AWS Account.
- Under the Identity Center user email section, Enter the first name and surname of the IAM Identity Center user. This user will then be granted the AdministratorAccess Permission to the new AWS Account.
- Under the Organization unit section, Select the OU that you want the new AWS Account to be provisioned in. This will then determine both the Preventative and Detective Guardrails that will be applied to it as part of the Account Baseline.
Once the AWS Account has been fully provisioned the Account will show as Governed within the Control Tower console.
Thats all for the basic configuration of AWS Control Tower. In an upcoming post, I’ll walkthrough how you can customise Control Tower.

